For the base, a square of white card, not too stiff, 14.5 cm square.
For the lid, a pretty piece of quality scrapbook paper 15cm square.
Double sided tape or glue.
Ruler, pencil, eraser, bone folder (optional), scissors.
Embellishments.
 1. Take the square of plain white card.
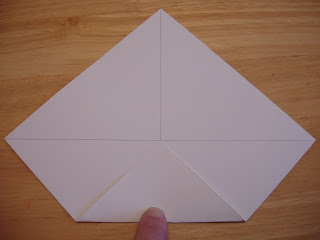
.JPG) 2. Lightly mark each diagonal with pencil and ruler. This will be the inside of the base of the box.
2. Lightly mark each diagonal with pencil and ruler. This will be the inside of the base of the box..JPG) 3. Working on one corner fold the point to the centre of the card (marked by pencil). I use a bone folder to ensure crisp straight edges to the box.
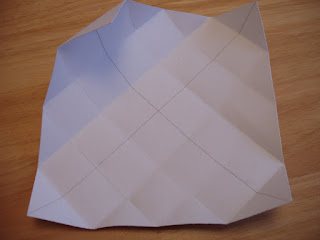
3. Working on one corner fold the point to the centre of the card (marked by pencil). I use a bone folder to ensure crisp straight edges to the box..JPG) 8. Repeat with the other three corners and you should have something like the photo above, with and unfolded square in the centre which is the inside of the base of the box.
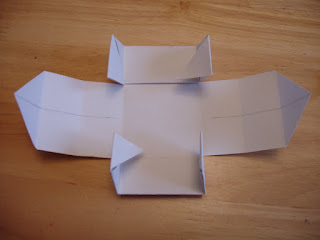
8. Repeat with the other three corners and you should have something like the photo above, with and unfolded square in the centre which is the inside of the base of the box..JPG) 9. Now we need to cut so we can fold the box into shape. Cut four slits as shown in the above photo. I find it easier to mark four dots so I remember to stop cutting!
9. Now we need to cut so we can fold the box into shape. Cut four slits as shown in the above photo. I find it easier to mark four dots so I remember to stop cutting!.JPG) 10. Rub out the pencil markings from what is the inside base of the box, the rest won't be seen when folded.
10. Rub out the pencil markings from what is the inside base of the box, the rest won't be seen when folded..JPG) 12. over again
12. over again.JPG) 15. Push the folded edge upwards to form sides, and stick the little triangle bits down if it helps. Then fold the points of the remaining 'sides' in once each. Attach a piece of double sided tape along the edge ( glue can be used but you will need to hold or clip the box until it has dried).
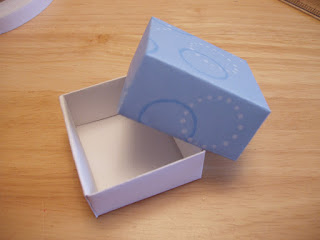
15. Push the folded edge upwards to form sides, and stick the little triangle bits down if it helps. Then fold the points of the remaining 'sides' in once each. Attach a piece of double sided tape along the edge ( glue can be used but you will need to hold or clip the box until it has dried). .JPG) 16. Fold the taped edge in, over the 'sides' of the box ,and squeeze to attach the tape firmly. Your base should be like this above.
16. Fold the taped edge in, over the 'sides' of the box ,and squeeze to attach the tape firmly. Your base should be like this above. .JPG)
.JPG)
.JPG)
.JPG)
.JPG)
.JPG)
.JPG)
.JPG)
.JPG)
.JPG)
.JPG)
.JPG)
4 comments:
i love your gift box photos. you've made it look easy, will give it a try. nice blog too.
Thank you, once you have made a couple they pretty easy to make without following instructions!
nice tutorial and lovely blog.
Great tutorial with very clear instructions. I love these boxes and I might give them a try although I doubt it they will look and neat as yours... I'm not very good at folding things ;-)
Post a Comment